
A prepaid label is a return shipping label created through your own shipping partner account and emailed to your customer when their return or exchange request is approved. Setup takes three steps, plus one optional step to make it fully automatic.
Step 1: Connect a shipping partner
- Go to Settings > Integrations and open the Logistics / Shipping tab.
- Choose your shipping partner.
- Enter your account credentials.
- Turn on Enable Integration and click Save.
Each partner page has a View Guide button if you need help. Your partner account is billed for each label.
[Screenshot: Logistics / Shipping tab with "Enable Integration" switched on]
Step 2: Set the label cost
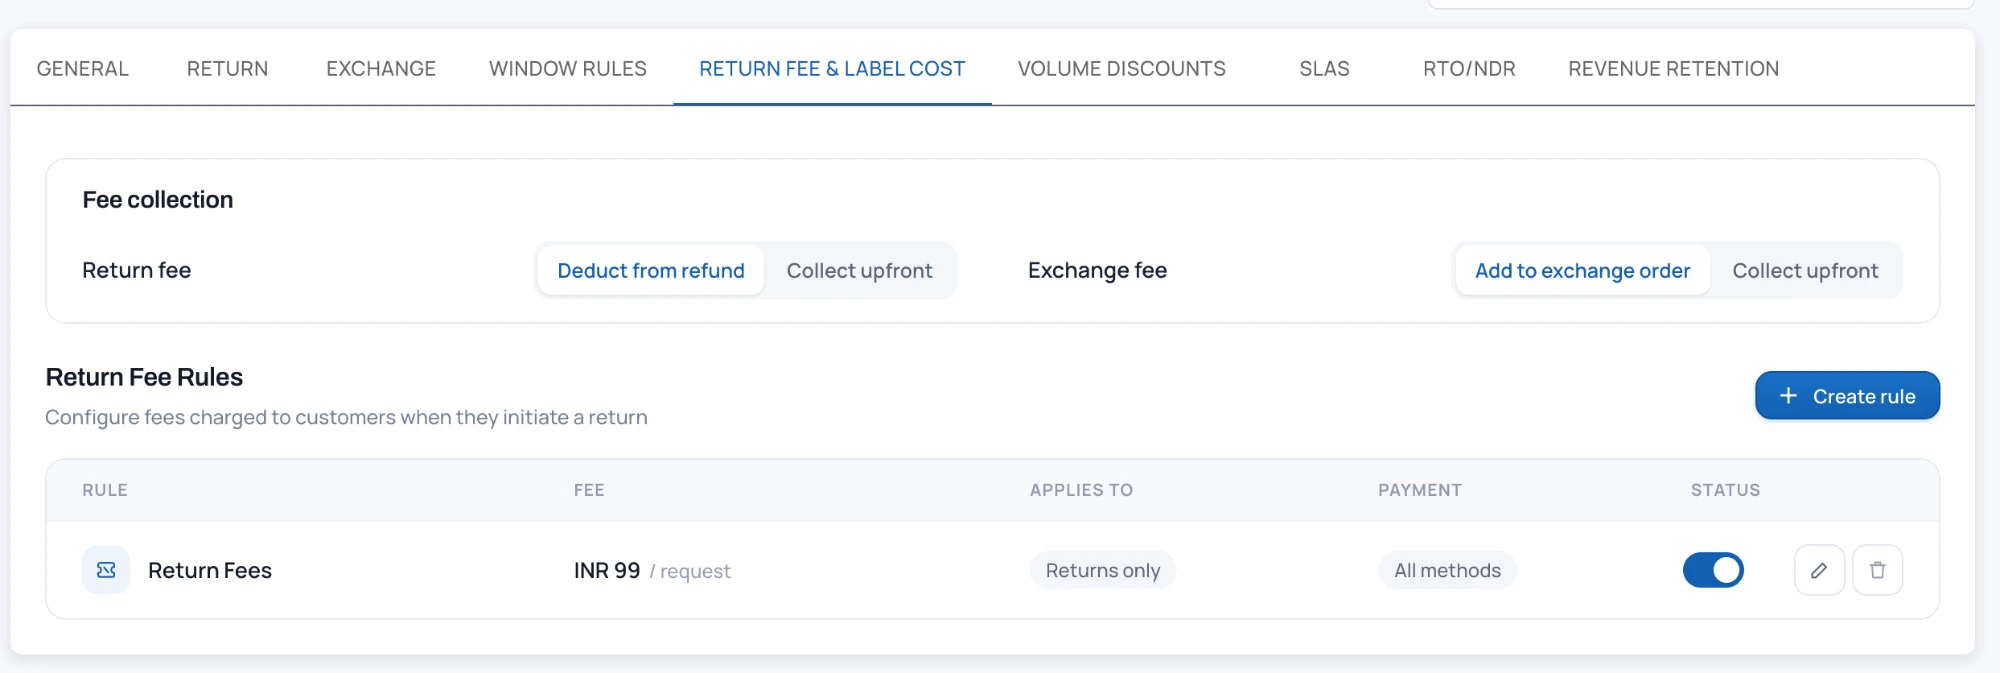
- Go to Settings > Policies and open the Return Fee & Label Cost tab.
- To keep labels free for customers, change nothing. By default the label is free for the customer and you absorb the cost.
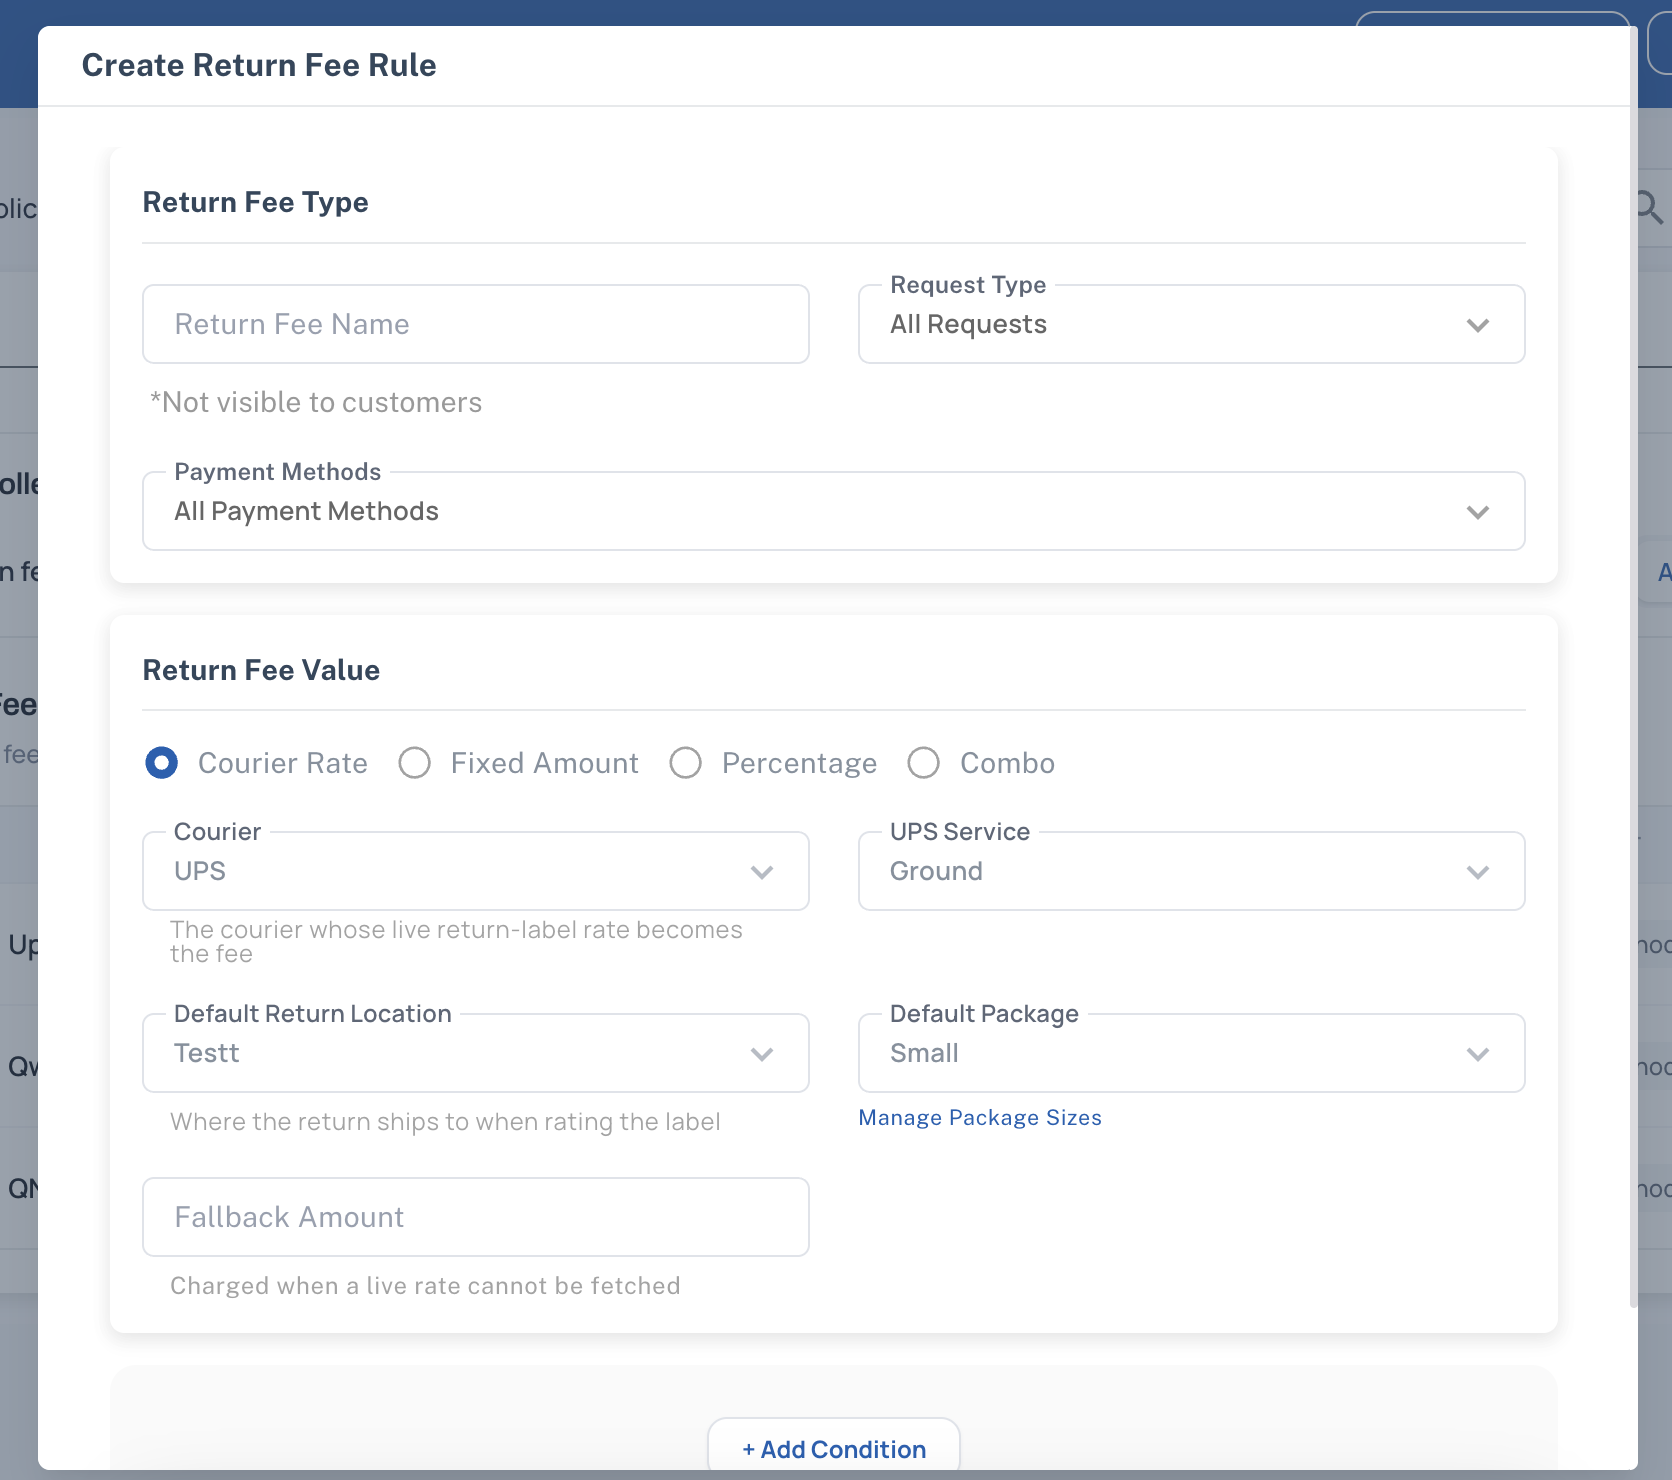
- To charge the customer, click Create rule and pick a fee type: Fixed Amount, Percentage, Combo, or Courier Rate (charges the live UPS label rate, with a fallback amount).
- Choose whether the rule applies to returns, exchanges or both.
- If needed, limit the rule with conditions such as return reason, product tag, SKU or customer location.
You can switch rules on and off from the Status column.
Step 3: Choose how the fee is collected
On the same tab, find the Fee collection card and pick one option for each request type.
Return fee
- Deduct from refund (default): the fee is subtracted from the refund.
- Collect upfront: the customer pays online when submitting the request.
Exchange fee
- Add to exchange order (default): the fee is charged on the exchange order.
- Collect upfront
Collect upfront needs a connected payment provider (Settings > Integrations > Payment tab). It stays greyed out until one is connected.
If you set Exchange fee to Collect upfront, a checkbox appears: Skip if the fee can be taken from the refund. Tick it to avoid charging upfront when the customer's refund already covers the fee.
Changes on this card save immediately.

Step 4 (optional): Generate labels without clicking Approve
Without this step, the label is created when you approve a request:
- Open the request and click Accept.
- Return Label is already set to Use Delivery Partner - Send Label.
- Pick the partner, package size and location, then confirm.
The label and tracking link are emailed to the customer.
To make this automatic:
- Go to Settings > Automations and click Create Automation Rule.
- Set When to Request Status is New.
- Set Action to Approve the Request.
- Select the Package Size, Logistic Partner and Warehouse/Location.
- Save the rule.
Automations depend on your plan, and a package size must be selected.
[Screenshot: Automation rule with Request Status = New and Approve the Request]
Optional: Let customers choose how to return
Go to Settings > Shipping Methods. Three methods are available, each with its own switch:
- Send a return label
- Drop off at store
- Ship it back myself
Under Send a return label, the Label source and Label cost notes link back to Integrations and your fee rules. Pickup date selection lets customers pick a preferred pickup date.
To charge a fee for one method only, add the Shipping Methods condition to a return fee rule.
Troubleshooting
| Problem | What to check |
|---|---|
| No label generated | No shipping partner is connected, or its Enable Integration switch is off. No package size or pickup location is selected. |
| Customer charged unexpectedly | An active rule applies. Check Policies > Return Fee & Label Cost. |
| Collect upfront is greyed out | No payment provider is connected. |
| Automation not running | Your plan does not include automations, or the rule has no Request Status = New condition. |